Thursday 17 December 2015

Flower Studio Images - WB 6

Photographing flowers in the studio using the 5x4 camera.

What makes a good photograph - The lighting, being selective with the lighting to show what you want to emphasis in the image. 


http://photo.net/large-format-photography-forum/00Ft2u  17.12.15

Looking at examples before we went in the studio of flowers taken in the studio, the way in which they have lit them brings the flowers out of the image, there's more emphasis on parts of the flowers. Things to think about when taking our own in the studio are:
  •  where the lights coming from - above, side, behind etc
  • snoots
  • water droplets on the petals
  • focus points
  • Lit from behind

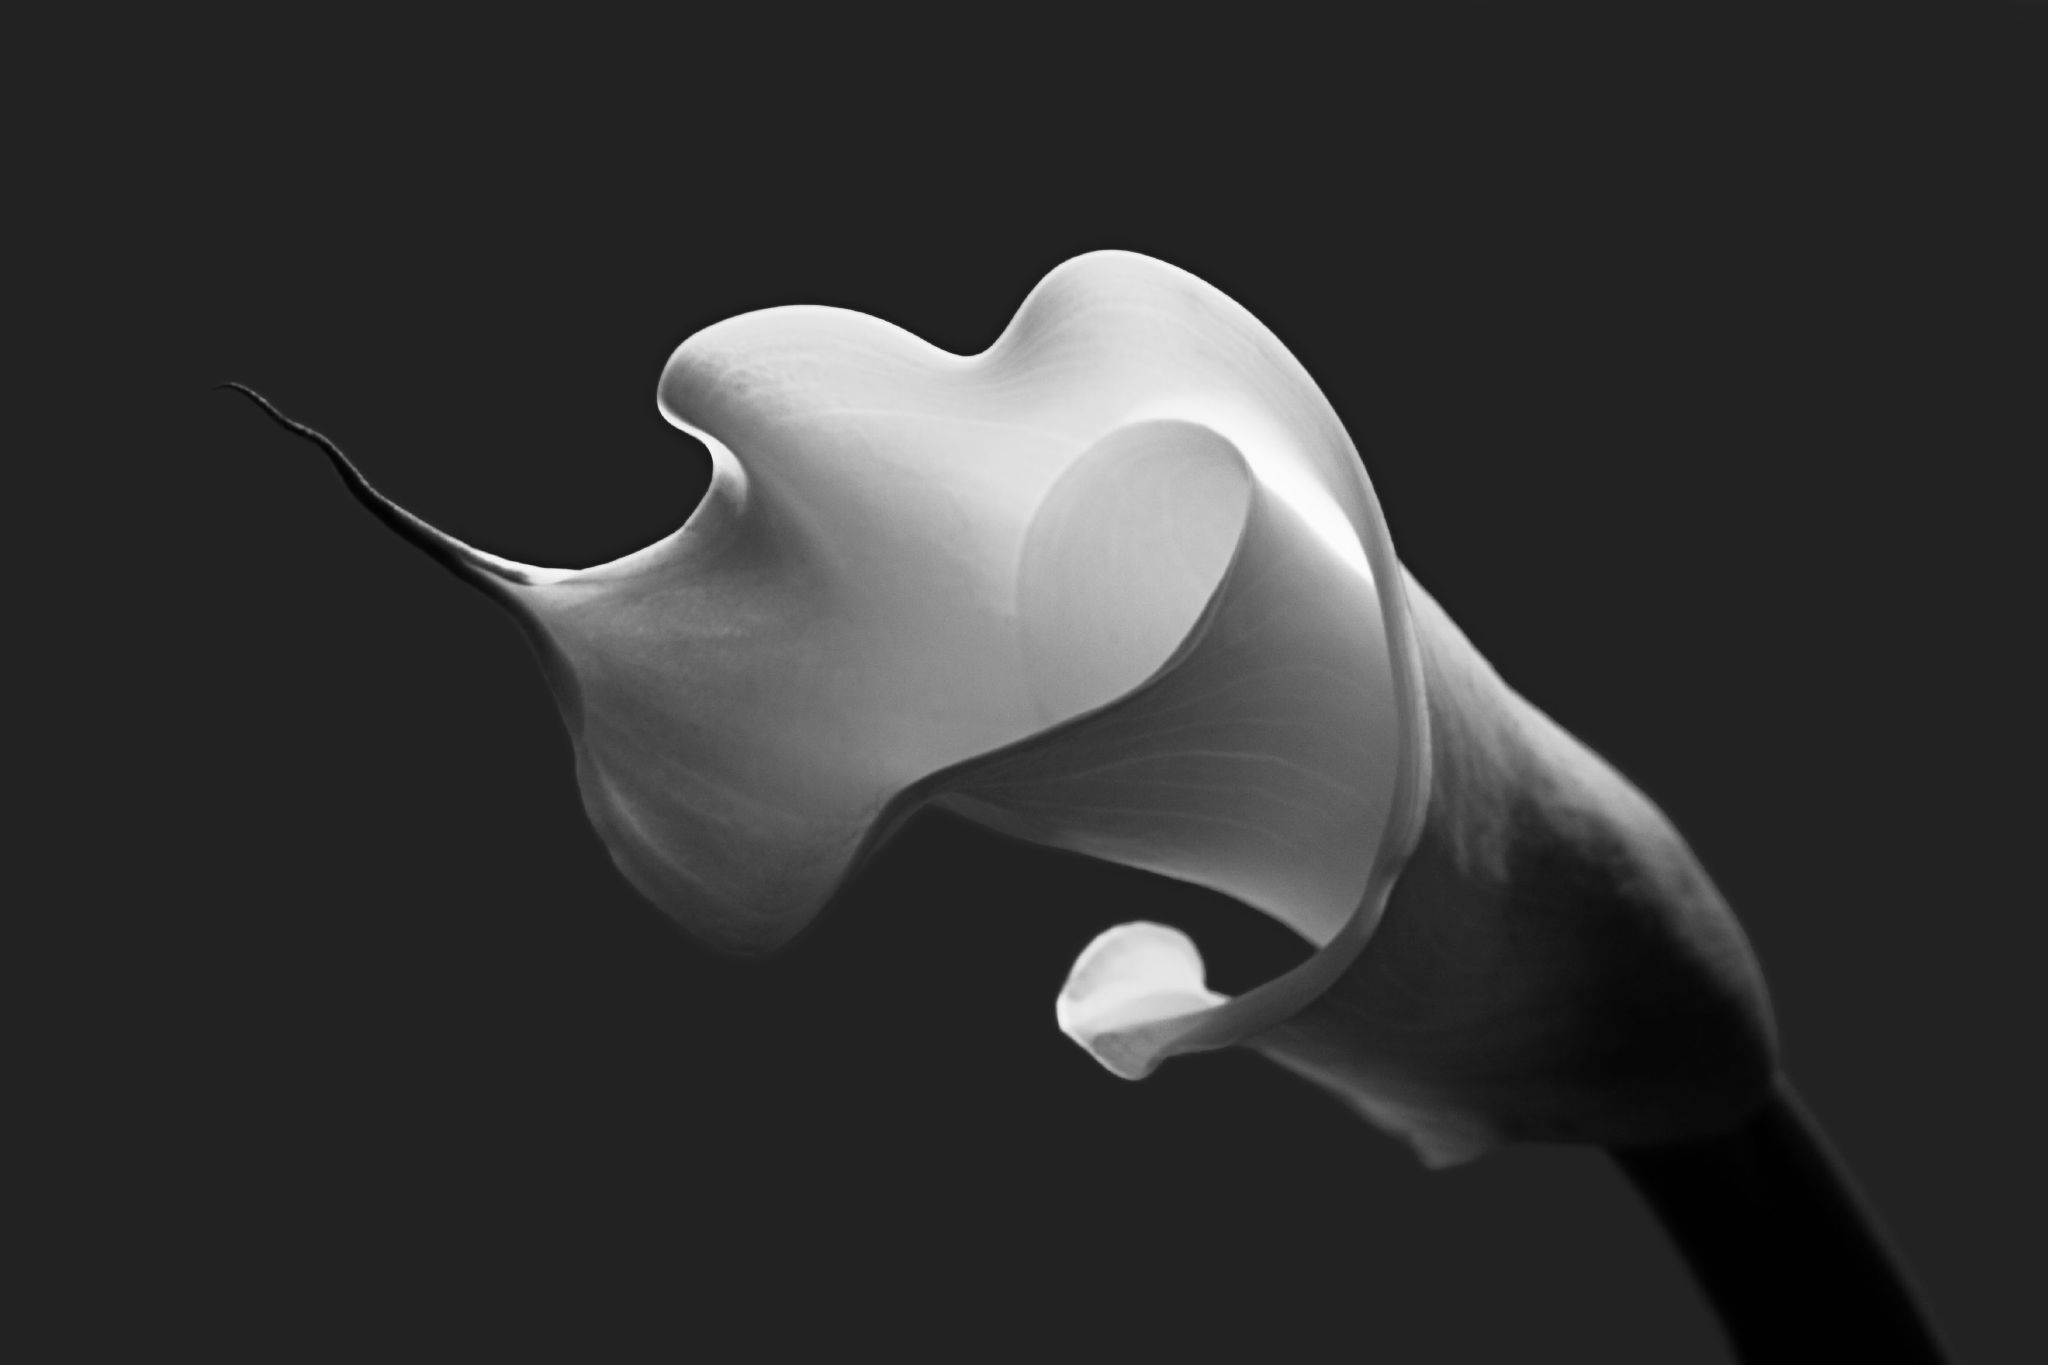
Flowers we chose to photograph are Lillies as these have a more interesting feel to the images, we set up the flowers on a box with them clamped on to a stand. We had black boards either side of the stand where the flowers were. The key light is the light with the snoot positioned to the side of the flower and with another 2 lights positioned at the white back drop to bounce light back. We experimented with the lights turning some off, re-positioning the key light to different positions to create different tonal ranges across the pictures this creates moods on the images. Before we set up the 5 x 4 camera we did some practice shoots with the canon 600d so we could get an preview of what the lighting set ups would look like. Using the light meter we determined what our camera settings would be. ISO - 100, F32 (but canon only goes to F29) 1/60 sec. Below are the contact sheets from the dslr some of the images have a great atmosphere and mood with some of the outcome using these set ups im hoping the negatives come out even better. We introduced water droplets into the images when using the 5 x 4 and took two images at a time before changing the position of the lights.


Setting up the 5x4 camera:
  • Open up the lens to the largest aperture
  • Focus on the area of your choice
  • Once happy with the focus close the lens down and readjust your aperture. (For this particular exercise F/22)
  • Attach the sync lead from the flash light to the camera.
  • Cock it back and load the negative at the back of the camera
  • Lift the slide turn it round and rest it in the top of the negative holder
  • Take the image.
Using one light to begin with looked boring, too bright, and the eyes didn't want to travel around the image any more than just a glance. So we decided to use a hand in front of the camera to direct some of the light around the image. Controlling the light adds a mood to images and you're more intrigued to look at all the image in sections. We introduced a back ground light starting the light at 1 going up to 2, then 6 going up to 6 was too bright so turned it down to 1. 


(Images took on canon 600d by Emma Quinn. As a group we set up and changed lighting set ups and arragned the flowers, before we took our own on the 5x4 camera.)


Darkfield & Lightfield - WB 6


Glass is hard to shoot for several reasons
  • It has mirror qualities and it reflects almost anything in front of it creating distractions
  • It is transparent and light just goes through it making it hard to define its shape
  • It is very smooth and punishes up for every speck of dust
In dark field lighting, you use a dark background. If all you used was a dark background the glass object would have no shape. The way to overcome this is by highlighting the glass edges.
The edges are lit by light, with the light positioned behind the object and black card. either side of the glass you have 2 pieces of black card into a V shape. The light will travel from the back of the card through the sides of the v shape to illuminate the edges of the glass.
Hint of Red SetupHint of Red  365/269
http://www.diyphotography.net/crossing-over-to-the-dark-field-has-never-been-easier/ 17.12.15
I done this technique in the studio the glasses we used were quite dirty I tried washing these in the toilet to the best i could but you could still see a lot of dust, prints and smears all over. I tried using the wine glass and a perfume bottle. The perfume bottle didn't look as effective as the wine glass as in I don't think I could illuminate to the best of what I could. As I couldn't get rid of the smears and no other glass objects to hand I tried using coloured gels on the lights. These are interesting and effective than just the white light shone from behind. 


Light field/ Bright field

Cheers  365/273

In bright field lighting we do the exact opposite from what we did in dark field.
The background is lit and the body of the glass pears to be white. The edges are defined by dark cards that create “negative light”.
Again, the background light is limited to the smallest area possible to reduce flare.
The image above was taken using the setup below. Two CFL snoots were used to create a contained white background, and black cards were used to define the edges of the glass.


Adding the same set up as above we created some interesting lighting set ups for photographing the lillies. You can apply this style of lighting not just to glass but to other objects as you can see from the images above it gives you great tonal ranges that gives the images added depth.


Using the 5x4 camera - WB 4


Shooting on the 5x4 camera today using 2 lights getting some close up of faces. The camera had to be extremely close to the model to get close enough for the shot, the lights were positioned either side of the model. Using the 5x4 camera it can be a very personal experence with how close you have to work next to the model. Its all about the depth of field, you are able to get parts of the face in focus while the rest is out. For example on the model above we focused on her lip piercings and the surrounding face features wont be sharp as her mouth. One light had the soft box attached while the key light had a white umbrella attached. We took the images and began to process the film sheets.

Processing 5x4 Film Sheets:

Pre soak in 20'c water for 1 minute


 Developer Chart Search Results

FilmDeveloperDilutionASA/ISO35mm120SheetTemp
Fomapan 100Rodinal1+1005077720C
Fomapan 100Rodinal1+191006.56.56.520C
Fomapan 100Rodinal1+251006.56.56.520C
Fomapan 100Rodinal1+25100443.520C
Fomapan 100Rodinal1+371006.256.256.2520C
Fomapan 100Rodinal1+501008-98-98-920C
Fomapan 100Rodinal1+10010010101020C
Fomapan 100Rodinal1+20010030303020C
Fomapan 100Rodinal1+5020021.521.521.520C
Fomapan 100Rodinal1+10040026262620C

We will be using the timing chart highlighted in yellow, our solution we use is Rodinal which is diluted 1 + 50 dilute it too weak and it will take longer to develop. 
  • 9 minutes in the developer and agitate while its developing.
  • 2 minutes in the stop bath
  • 2 minutes in the fixer 
Once the film sheets have been developed and washed you then have to hang them in a dryer to dry off before you can continue your process. Once they are dry (we left them over lunch time) they are then ready to scan in to the computer. Scanner we used was an Epson Scanner, loading the negative dull side down  you select the settings in the drop down menu.
  • Doc - Film with holder
  • Film Type - B&W negative film
  • Image type - 16 bit grayscale
  • Resolution - 300
Preview scan so you can change the view. Scanning in on a lower resolution will give a quicker look at the finished results with some amount of detail but if scan in the negative on a higher resolution you it take longer but the detail in the image is remarkable. The 5x4 captures detail beyond belief it really is fascinating the pours in skin the tiny vessels in the eyes you get to see everything!


Michelle Rogers Pritzl - WB 4

Michelle Rogers Pritzl was born and raised in Washington DC, where she began studying photography in high school. Pritzl received a BFA from the Corcoran College of Art and Design in 2001, a MA from California State University in 2010, and a MFA in Photography from Lesley University College of Art, where she studied with Christopher James, in 2014. Her work explores the tension between past and present in our psychological lives as well as the photographic medium itself, often working in a digital/analogue hybrid. 

Pritzl works in alternative and historic photographic processes, and has been widely exhibited in New York, New Orleans, Fort Collins, Boston and Washington DC, amongst others. Pritzl was a Critical Mass Top 250 finalist in 2013; she has been featured in Lenscratch, Noovo Editions, Diffusion Magazine, Lumen Magazine and her work as been recognized by the International Photography Awards, LensCulture and the Prix de la Photographie Paris. 

Pritzl has taught photography and drawing in both high school and college for the last 10 years, most recently serving as an adjunct instructor at Lesley University College of Art, as well as leading workshops for the Griffin Museum of Photography. She is represented by Corbis Images.

Information found at https://www.lensculture.com/michelle-rogers-pritzl on 15.12.2015


https://www.lensculture.com/michelle-rogers-pritzl on 15.12.2015

Vanessa Marsh - WB 4

The work of artist Vanessa Marsh is perhaps most accurately described as photography.  Marsh creates her richly layered compositions one layer at a time. Using drawings on clear acetate sheets and small- scale models she creates a narrative unfolding on a landscape. After producing several such landscapes Marsh photographs the combined layers. The resulting photographs are pictured here.The numerous planes in each piece are similar to past and present time and the memories that accompany it. In fact, of her work, Marsh says:

“Within the series I am exploring not only the working of memory and imagination but also our contemporary relationship to the landscape, where we might find ourselves in the future and how our feelings towards the landscape often center around ideas of dislocation, need and yearning."

http://beautifuldecay.com/2012/11/06/vanessa-marshs-multi-layered-silhouette-photographs/ on 15.12.2015


 http://beautifuldecay.com/2012/11/06/vanessa-marshs-multi-layered-silhouette-photographs/ on 15.12.2015