Ill be looking at which process interests me and look into more detail at what materials and chemicals I will be needing to create my own solution. This side of photography is the more scientific side where as digital photography is a case of point shoot and preview them on the computer. It will be exciting to go back to the beginning almost and test these methods out, get you back to the basics of photography.
Albumen Prints
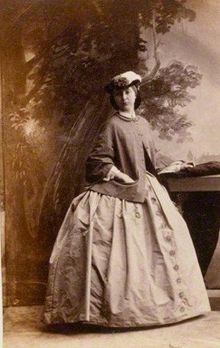
The albumen print, also called albumen silver print, was published in January 1847 by Louis Desire Blancquard-Evrard, and was the first commercially exploitable method of producing a photographic print on a paper base from a negative It used the albumen found in egg whites to bind the photographic chemicals to the paper and became the dominant form of photographic positives from 1855 to the turn of the 20th century, with a peak in the 1860-90 period. During the mid-19th century, the carte de visitie became one of the more popular uses of the albumen method. In the 19th century, E. & H. T. Anthony & Company were the largest makers and distributors of the Albumen photographic prints and paper in the United States.
www.alternativephotography.com 10/12/15
A well-presented albumen print begins with high quality paper.
- 12 eggs or enough for 500ml of egg whites
- 15-g ammonium chloride or salt
- 15-ml distilled water
- 2-ml 28% acetic (glacial) acid
- 15-g sodium citrate (optional preservative)
- 2 drops Kodak PhotoFlo (optional)
- 37.5-g silver nitrate
- 250-ml distilled water
- 2 drops 6.5-7% potassium dichromate (optional contrast control)
Preparing the albumen:
To double coat 50 sheets of 8.5X11 paper, you will need about 500-ml of egg whites. Separate the eggs, avoiding getting yolk, shells or chalazae (the stringy white stuff) in the whites. Pour the 500-ml of egg whites, 2-ml of 28% acetic acid, 15-ml of distilled water and 15-g of ammonium chloride (sodium chloride or kosher/deiodized table or sea salt may be used as an alternative to ammonium chloride) into a large glass bowl. Additionally 15-g of sodium citrate may be added as a preservative. This is not necessary if you will be using your albumen mixture within a couple months and will be using your newly-created paper shortly thereafter. Beat the mixture with a whisk (an electric hand mixer will make this much less tiring) for a minimum of 30 minutes. The mixture will become very meringue-like but will not stiffen. The longer the mixture is beaten, the finer the suspended air bubbles will become until nothing is left but a fine froth.
After beating, cover the bowl with plastic wrap, and place it in a refrigerator overnight. The mixture will settle, leaving a dirty froth on top. Remove and discard the froth, and filter the remaining albumen (approximately 350-ml of a surprisingly free-flowing liquid) through cheesecloth, folded two or three times, into a clearly labelled glass jar with a plastic lid. Adding a drop or two of a wash aid such as Kodak PhotoFlo will help prevent the formation of bubbles on the surface of the paper at time of coating. Age the mixture in a refrigerator for a week or so to further denature it. This is your sizing/salting mixture.
Coating the paper:
Pour the albumen into a glass casserole dish. Scrape away any tiny bubbles, which will probably have formed on the surface of the liquid. Place a sheet of paper, front side down, on the surface of the albumen. (Look for the watermark while holding the paper up to a light. If the watermark reads correctly, you are looking at the front side of the paper.) Float the paper on the mixture for three minutes. The edges of the paper, which will curl up and away from the surface of the liquid, can be pushed down SLIGHTLY to ensure proper contact.
Using the silver nitrate solution brush it over the sheet of paper (using a brush can create the textured feel to the image the alternative is to clamp down the image and using a rod and syringe apply the silver nitrate in that way. (as shown in the video.)
en.wikipedia.org 10/12/15 dig.henryart.org 10/12/15

Salt Print Process
The salt print was the dominant paper-based photographic process for producing positive prints during the period from 1839 through approximately 1860.
The salted paper technique was created in the mid-1830s by English scientist and inventor Henry Fox Talbot. He made what he called "sensitive paper" for "photogenic drawing" by wetting a sheet of writing paper with a weak solution of ordinary table salt (sodium chloride), blotting and drying it, then brushing one side with a strong solution of silver nitrate. This produced a tenacious coating of silver chloride in an especially light-sensitive chemical condition. The paper darkened where it was exposed to light. When the darkening was judged to be sufficient, the exposure was ended and the result was stabilized by applying a strong solution of salt, which altered the chemical balance and made the paper only slightly sensitive to additional exposure. In 1839, washing with a solution of sodium thiosulfate ("hypo") was found to be the most effective way to make the results truly light-fast.
The salt print process is often confused with Talbot's slightly later calotype or "talbotype" process, in part because it was normally used when making prints from calotype paper negatives. Calotype paper employed silver iodide instead of silver chloride, but the most important difference is that it was a developing outprocess, not a printing out process like the salt print, meaning that a much shorter exposure was used to produce an invisible latent image which was thenchemically developed to visibility. This made calotype paper far more practical for use in a camera. Salted paper typically required at least an hour of exposure in the camera to yield a negative showing much more than objects silhouetted against the sky. https://en.wikipedia.org/wiki/Salt_print
INGREDIENTS
- Sodium Chloride 2.0 gm
- Distilled Water to make 100.0 ml
- Silver Nitrate 12.0 gm
- Distilled Water to make 100.0 ml
I recommend starting with this recipe since it is the most basic. The amount of salt can be altered slightly but at three grams per 100 ml the paper prints a very faint violet unless double coated with silver. At four grams per 100 ml I could only get a faint violet image. It is possible to make prints with much lower salt concentrations than the standard 2%. Substituting ammonium chloride for sodium chloride moves the print color from sepia towards more of a reddish brown and also increases print speed slightly. The amount of silver nitrate solution can be lowered to around 10% (10 grams per 100 ml).
Method
1) Mix up the salting solution. Before coating write the name of the paper on the back in pencil for future reference and also so that after it is coated and dried you will be able to tell which side the coating is on. Smooth, preferably hot press, paper works best. It is important that the paper not be too porous since the solutions will have a tendency to sink in too deeply. One paper that I have found to work nicely with no additional sizing is Rising Stonehenge. Using masking tape, tape the paper at the corners to a heavy sheet of glass. Measure out an appropriate amount of salting solution. I use a pipette that I have marked so that the amount of solution won’t vary from print to print. Coat the paper. I like to use a glass rod for coating.
A detailed description of glass rod coating can be found at Bostick & Sullivan. http://www.bostick-sullivan.com/newbook/Page_thumbs.htm.
Use a foam brush or hake (Japanese generic term for brush) if you want prints with painterly brush marks. Allow the paper to dry. A hair drier at any setting can be used to speed up the process. Salting can be carried out under bright light and the salted paper will keep indefinitely.
 2) After the salted paper is dry, under safe light conditions, coat it with the silver nitrate solution. Salted paper is mainly sensitive to ultraviolet light so exposure to low level tungsten light will not fog it. Just to make sure that my paper doesn’t get fogged I work under the light of a 7 watt, yellow light bulb placed one meter above my coating area and another one above my darkroom sink. Be very careful not to get silver nitrate on your skin or, more importantly, in your eyes. It could blind you. If you use brushes you should use a separate brush for each of the two solutions. I use two separate pipettes and coating rods.
3) Dry the paper in the dark. If you use a hair dryer use the cool setting. The paper is now ready for printing and should be used right away to avoid fogging.
http://www.alternativephotography.com/wp/processes/saltprints/a-dash-of-salt 10/12/15

Cyanotype Process
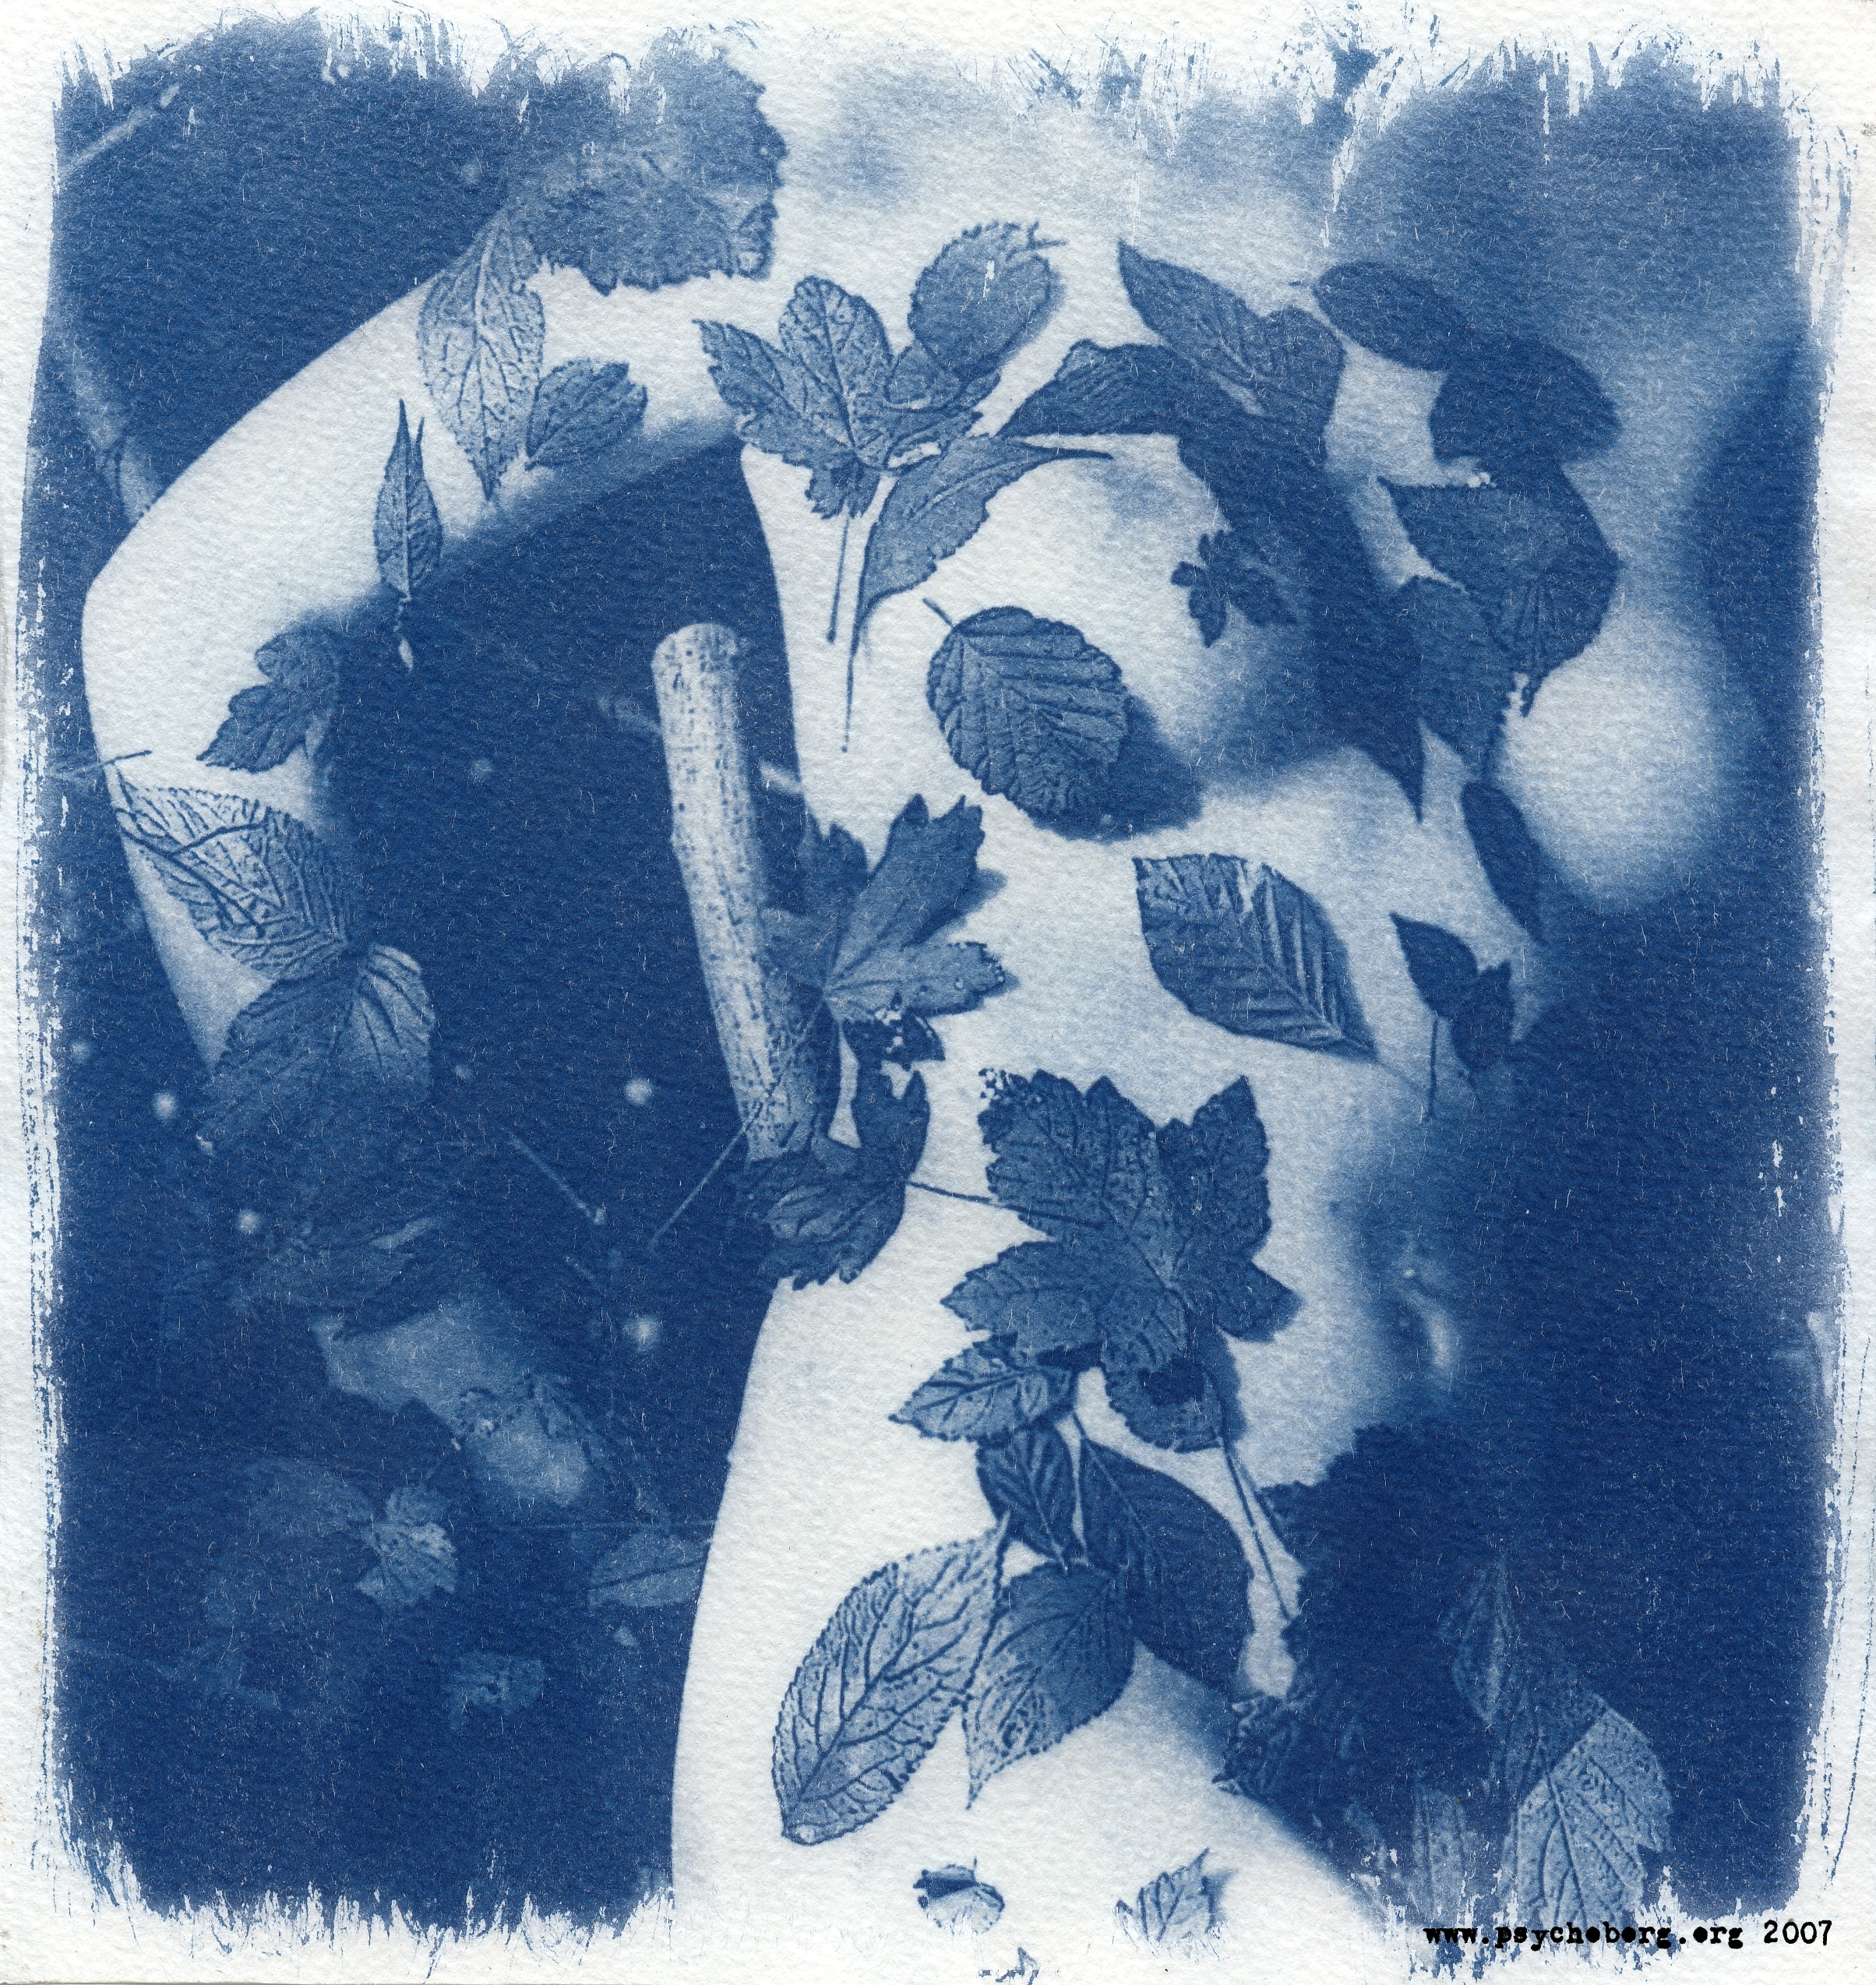
Cyanotype is a photographic printing process that produces a cyan-blue print. Engineers used the process well into the 20th century as a simple and low-cost process to produce copies of drawings, referred to as blueprints. The process uses two chemicals: ammonium iron(III) citrate and potassium ferricyanide.
Cyanotype Process
Cyanotype is a photographic printing process that produces a cyan-blue print. Engineers used the process well into the 20th century as a simple and low-cost process to produce copies of drawings, referred to as blueprints. The process uses two chemicals: ammonium iron(III) citrate and potassium ferricyanide.
https://en.wikipedia.org/wiki/Cyanotype
Ingredients:
Ingredients:
- 25 grams of Ferric ammonium citrate (green)
- 10 grams of Potassium ferricyanide
- Water (distilled if possible)
- Scale or measuring spoons
- Measuring jug
- 3 glass containers for mixing ingredients
- Plastic spoons
- Face mask (DIY style)
- Goggles
- Rubber gloves
- Apron or old shirt
- Newspaper to cover work surface
- Cleaning cloth
- Brushes or coating rod
- Clothes pegs (plastic)
- Washing line or rope (plastic)
- Art paper or fabric for coating
- Glass or a contact print frame
- Sunshine or a UV light source
This recipe makes approximately 50 8×10 inch prints. The cyanotype is made up of two simple solutions:
- Solution A: 25 grams Ferric ammonium citrate (green) and 100 ml. water.
- Solution B: 10 grams Potassium ferricyanide and 100 ml. water.
 Mixing the chemicals
Dissolve the chemicals in water to make two separate solutions. Add Ammonium ferric citrate to water into one container and Potassium ferricyanide to water in another. Stir with a plastic spoon until the chemicals dissolve. Mix equal quantities of each solution together in a third container. Unused solutions can be stored separately in brown bottles away from light, but will not last very long once they have been mixed. Dispose of any unused chemicals in a sensible and environmentally friendly way!
Your work area
Your floors, carpets, walls, work surfaces, clothes and skin can be stained by the chemicals. Cover all possible areas, use rubber gloves and an apron or an old shirt to work in. If you have the space, choose an area where you can spread out. Ordinary light bulbs or tungsten light is safe to use, but UV light will affect your prints. Some fluorescent lighting may also affect your prints.
 Preparing the canvas
Using a brush, simply paint the chemicals onto the material. Paper, card, textiles or any natural material can be used to print on. Decide how big your print is going to be, and cut your material to size. Make sure your working area is dimly lit, or lit with a low-level tungsten bulb. Once the material is coated, leave it to dry in the dark.
 Printing the cyanotype
Print a cyanotype by placing your negative (to reproduce a photograph) or object (to make a photogram) in contact with your coated paper or fabric. Sandwich it with a piece of glass. Expose the sandwich to UV light. Natural sunlight is the traditional light source, but UV lamps can also be used. A photogram can also be made by placing items on the surface. Plants, decorative items or other objects can be used to create silhouettes or interesting shapes. Exposure times can vary from a few minutes to several hours, depending on how strong your lightsource is or the season where you are printing.
Processing and drying
When the print has been exposed, process your print by rinsing it in cold water. The wash also removes any unexposed chemicals. Wash for at least 5 minutes, until all chemicals are removed and the water runs clear. Oxidation is also hastened this way – bringing out the blue color. The final print can now be hung to dry and be admired.
http://www.alternativephotography.com/wp/processes/cyanotype/cyanotype-classic-process
https://www.youtube.com/watch?v=4HxN0B7xyCU
1. Start with any flower you like although the following seem to work well: Poppies (images below were made with the red poppies above) or Peonies (Clive Heritage-Tilley). According to Henry S. Snelling the leaves of the laurel, common cabbage, and the grasses, are found sufficiently sensitive. I have also tried Goldenseal and Echinacea but results were not encouraging.
The most important thing to remember is that many, many species of flowers have never been explored. Crush the petals in a pestle and mortar to a fine pulp and add a little distilled water as you go. The purest water you can find is recommended since any impurities will interfere with the delicate light sensitive properties of the emulsion. Filter the juices through a cheese cloth or clean linen to remove small plant bits and some impurities.
2. Using a clean simple brush coat any paper you like (hand-made Paper being an extra nice touch) in nice even strokes vertically and horizontally leaving no pools of emulsion on the surface.

Anthyotypes Process
Anthotypes are a beautiful way to create fine art images right from your garden. This long neglected process, originally invented by Sir William Herschel in 1842, is simple yet elegant. An emulsion is made from crushed flower petals or any other light-sensitive plant, fruit or vegetable. A coated sheet of paper is then dried, exposed to direct full sun-light until the image is bleached out. This is done ideally in a printing frame over 1-3 days or more depending on conditions and negative/material. What you see is what you get. No fixation is required. You can follow the gradually emerging image as you go. Results vary greatly from plant to plant and the strength of the emulsion employed. The resulting images are exquisite and often almost wispy or dream-like.
The Anthotype process is a beautiful way to make images and is certainly the most environmentally-friendly.
1. Start with any flower you like although the following seem to work well: Poppies (images below were made with the red poppies above) or Peonies (Clive Heritage-Tilley). According to Henry S. Snelling the leaves of the laurel, common cabbage, and the grasses, are found sufficiently sensitive. I have also tried Goldenseal and Echinacea but results were not encouraging.
The most important thing to remember is that many, many species of flowers have never been explored. Crush the petals in a pestle and mortar to a fine pulp and add a little distilled water as you go. The purest water you can find is recommended since any impurities will interfere with the delicate light sensitive properties of the emulsion. Filter the juices through a cheese cloth or clean linen to remove small plant bits and some impurities.
3. Dry the paper in the dark over-night or with a hand dryer on low heat.

4. Contact print any media or plant in a printing frame or clip frame. Expose in full sunlight over 1-3 days or more depending on your aesthetic. Done. The print can be kept in subdued or artificial light although exposure to direct sunlight is discouraged.
A method of fixing Anthotypes is not known and perhaps not necessary despite obvious limitations.
A method of fixing Anthotypes is not known and perhaps not necessary despite obvious limitations.

content.photojojo.com 10.12.2015

No comments:
Post a Comment