Showing posts with label reasearch book 1. Show all posts

Thursday, 17 December 2015

Lee Towndrow - WB 1

lena-dunham-by-lee-towndrow.jpg

sheila_heti_for_das-0732_0.jpg

lee-towndrow-paper-portraits-steve-kado_0.jpg

lee-towndrow-paper-portraits-max.jpg

I started out as a designer making album covers. I was moved by Cunningham's All is Full of Love to learn Flame and quickly became a lead artist with a roster of clients. After a number of years running sessions in the suite, I set out to broaden my mastery of the image in the physical world. I worked in Buenos Aires on fine art installations, and became an award-winning photographer (TIME Magazine, Fast Company) and a cinematographer (HBO's Going Clear, Ivory Tower). I refined my eye for lighting, composition and story. Excited by the rapid developments in CG, I expanded my skills by learning Nuke.

http://leetowndrow.com/index/#/paper-portraits/


Friday, 11 December 2015

Thomas Kettner - WB 1

http://thomaskettner.com/#/albums/filter/beauty/ 11/12/15

Thomas Kettner – Photographer, director, CEO and creative director – born in 1960 in Stuttgart, Germany – raised in Johannesburg, South Africa is traveling for his clients since almost 30 years across all continents of the world, searching for the most spectacular, unique and outstanding picture.
After studying machine tool engineering and photo-design in Bielefeld, operated within and from his studio in Stuttgart. September 2013 was the time to move on. Now Hamburg has become the centre of his work and life, from where he operates with his international teams and network.
Crossing the lines in all aspects and going far beyond, diving with whales, shooting on floating icebergs, working with wild cheetah’s or flying in an open helicopter over Buckingham Palace, always determined to get the solitaire of a picture.
Listening, patience, understanding and highest claims are just some of his assets, that his clients can always count on.
With his long-term project «L’hommage» he becomes a portaitpainter of biographies, which are full of imagination and aspiration which he gently seeks and traces.
Numerous awards have given Kettner a name, that stands for experimental photography just as for fashion, advertising, people or lifestyle.
Since 2004 he is member of the board in the BFF – Bund der freischaffenden Fotografen und Filmgestalter – (alliance of the freelance photographers and film creators), one of the most outstanding associations of freelance photographers in europe. He also gets involved in cooperate social projects for example the «German Doctors», the «Cheetah Conservation Fund», «Hiege-Stiftung gegen Hautkrebs» and the «Dominik Brunner Foundation».
His spectrum of clients goes from Lufthansa, Mercedes Benz, BOSS, Wella, Gübelin, Schwarzkopf, BOSCH, Peter Hahn, Ulla Popken, Gina Laura, OTTO, TCHIBO, C&A, SPORT 2000 and many more.


Sarah Cheng De Winne - WB1,3


http://www.sarahcheng-dewinne.com/  11/12/15

Kale Gustafsson - WB 1


www.kallegustafsson.com/  11/12/15


Hailing from Sweden, Kalle Gustafsson set out to become one of the most appreciated and widely recognised photographers (and movie directors) from Scandinavia.

Kalle Gustafsson is known all over the world for his work in fashion photography, as showcased by his extensive portfolio. Gustafsson's particular approach to fashion photography has been strongly influenced by Scandinavian design trends. This means that his signature style is usually very organic, minimal and natural. Most of his shots have a very special cinematic quality, with wide open views and twilight illumination. This particular influence is probably traceable to Kalle's work as a movie director. His images have a very iconic feel, yet, they manage to capture emotion and pathos wonderfully. 


Kalle Gustafsson is particularly recognised for his romantic style. Over time, he became very influential on a new generation of European photographers, leading to an increase in popularity of this particular style. Kalle Gustasson is the quintessential example of a photographer who set out to combine his technical proficiency with an outstanding and creative artistic vision throughout his work. 
http://100photographersin100days.blogspot.co.uk/2014/02/kalle-gustafsson.html 11/12/15


Sarah Ann Loreth - WB 1

 6535655165_d43399367e_o.jpg
kelly.jpg _MG_9779.jpg

www.sarahannlorethphotography.com 11/12/15
Sarah is a fine art and travel photographer from New England, who specializes in conceptual portraiture. In her work she tries to convey a quiet stillness of emotion with a connection to her natural surroundings. She stumbled upon photography while working in the medical field and threw all her energy into teaching herself the craft.


Maurizio Anzeri - WB 1


www.saatchigallery.com/artists/maurizio_anzeri.htm
11/12/2015


Maurizio Anzeri makes his portraits by sewing directly into found vintage photographs. His embroidered patterns garnish the figures like elaborate costumes, but also suggest a psychological aura, as if revealing the person’s thoughts or feelings. The antique appearance of the photographs is often at odds with the sharp lines and silky shimmer of the threads. The combined media gives the effect of a dimension where history and future converge. The image used in Round Midnight is an early 20th century ‘glamour shot’ that at the time would have been considered titillating for both the girl’s nudity and ethnicity. Anzeri’s delicately stitched veil recasts the figure with an uncomfortable modesty, overlaying a past generation’s cross-cultural anxieties with an allusion to our own.

Tuesday, 1 December 2015

Using the studio and lighting set ups - WB 1,3

Health and Saftey in the studio:

“What health and safety law requires
The basis of British health and safety law is the Health and Safety at Work etc. Act 1974.
The Act sets out the general duties, which employers have towards employees and members of the public, and employees have to themselves and to each other.
These duties are qualified in the Act by the principle of ‘so far as is reasonably practicable’. In other words, an employer does not have to take measures to avoid or reduce the risk if they are technically impossible or if the time, trouble or cost of the measures would be grossly disproportionate to the risk.
What the law requires here is what good management and common sense would lead employers to do anyway: that is, to look at what the risks are and take sensible measures to tackle them.
The Management of Health and Safety at Work Regulations 1999 (the Management Regulations) generally make more explicit what employers are required to do to manage health and safety under the Health and Safety at Work Act. Like the Act, they apply to every work activity.
The main requirement on employers is to carry out a risk assessment. Employers with five or more employees need to record the significant findings of the risk assessment.
Risk assessment should be straightforward in a simple workplace such as a typical photographic studio or location. It should only be complicated if it deals with serious hazards such as those in a darkroom using chemicals.”
Risk Assessments
We all know that we need to do some form of risk assessment but what is involved in doing this. Why if we are freelance photographers should we consider doing one. For a start, if you have public liability insurance you can claim to being aware of any issues before they arise and you have some paper work that shows you where aware of any issues if something should happen. Apart from this it is good practice to do a risk assessment as it shows you clients, subjects and co-workers that you do care about providing a positive and safe working environment for everyone. The Health and Safety Executive has the following guide you should download and consider using: “Five steps to risk assessment “ on the HSE website or Five steps to risk assessment.
You can download the form only from here Photographers Risk Assessment
You need to follow these five steps, to not only be aware of risks but, also to do something about them.
  1. Identify hazards.
  2. Decide who might be harmed and how.
  3. Evaluate the risks and decide on precautions.
  4. Record your findings and implement them.
  5. Review your assessment and update if necessary.
Working on Location. The Health and Safety Executive has a useful guide in Buildings used for locations or temporary studios in film and television. That covers things like working in buildings, control measures, fire, responsibilities, hazards, Utilites, Vermin, hazardous materials, rubbish and debris to name a few of the details it goes into.
In the guide it refers to ‘must’ as being a legal obligation and words like ‘do’ should’ as advice on good practice. I would recommend that you download this guide from the link below as it is an in-depth look at things you should consider when working on location.
See link below for a form, that will help in checking the location for any health and safety issues that you may encounter. (which is also in the guide from the listed here). Health and Safety Executive, Buildings used for locations or temporary studios in film and television on the HSE website or Buildings used for locations or temporary studios in film and television or download the modified one that I have created based on the one for television. Here: Location photography Health and Safety
One area that photographers need to consider is the possibility of people tripping or slipping over.
“Slip and Trip Hazards Control measures
In order to effectively control slip and trip risks, employers should:
  • Identify the hazards – look for slip and trip hazards around the location or photo studio.
  • Decide who might be harmed and how – look at who comes onto the location or photo studio, and whether they are at risk.
  • Consider the risks and decide if precautions already being taken are enough, or if more needs to be done.
  • Record the findings.
  • Review the assessment regularly and revise it if necessary.
Location or photo studio premises are varied and often complex sites. The measures to control the risks will vary according to the different areas of the location or photo studio and the different activities being undertaken. Each will need to be assessed separately and a range of practical measures adopted to control the risk depending on the assessment. The risk factors to consider include:
  • Environmental (floor, steps, slopes etc).
  • Contamination (water, food, litter etc).
  • Organisational (task, safety culture etc).
  • Footwear (for example, footwear worn for photographic sessions may not always be in line with sensible shoes for work).
  • Individual factors (eg information and training, 
supervision, pedestrian behaviour etc).”
The points above have been modified for the photographic studio and come from: Health and Safety Executive. Preventing slip and trip incidents in the education sector on the HSE website or Preventing slip and trip incidents in the education sector.
Studio Task

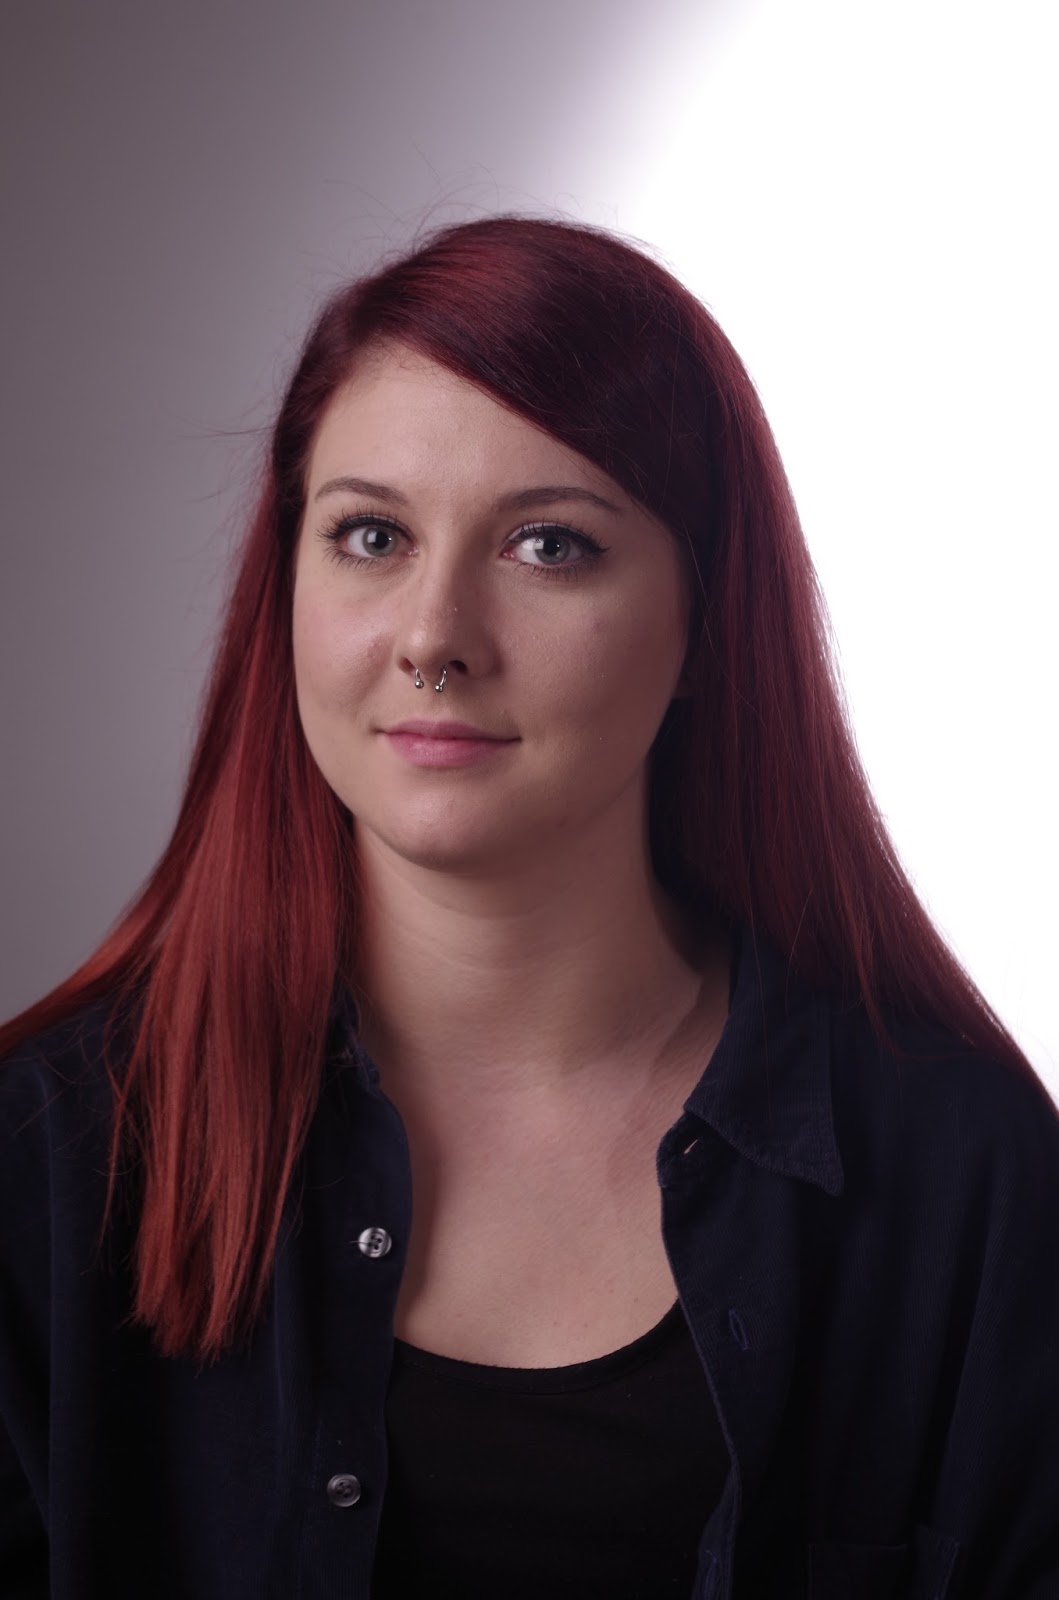
Today we went into the studio to set up lighting for some images ready for us to start using the 5x4 camera. At first we was going for a bright white evenly exposed background, we were using 4 lights 2 at the background one with a beauty dish and another with bowl reflector. The front lights one with a snoot and another with soft box. Background lights want to be f64 and the front lights wanted to be f22 which will be two stops lower than the back.

Using the light meter we can get an accurate measurement of the amount of light hitting the subject/background . To do this you connect the sync lead up to the light and have it attached to the light meter. Set the light meter up for the right mode for this particular exercise it will be the symbol of the flash with a little c. Set the ISO to 100 and set the shutter speed for the speed you want, you then trigger the flash with it pointing towards the light in front of your subject. This will give you the reading of what your f number will be.


We incurred a problem as the lights wouldn't get up to f64 the highest the back lights went up to was f22, this accident actually worked out ok as the overall image had a beautiful soft balanced contrast. The background went from grey fading into white. Not having the background just as a white or a grey and mixing them up it creates a more atmospheric feel towards the image.


Handheld light meters have three important functions: 
  1. They read light being reflected from a subject.
  2. They read the light falling on a scene or subject, that is, the incident light.
  3. They read the light from an electronic flash.

Flash Mode

Most handheld meters also function as a flash meter. This is extremely valuable in the studio and on location when you are using one or more flash units. The meter is able to detect the brief burst of light, and it will give you a perfect exposure. All the insecurity of flash exposure is gone. Notice in the photos below that the lighting on the model’s face is different. In the first shot I used only one light while in the second I used a main and a fill, and yet the meter in flash mode produced perfect results in both types of light. If you want to do multiple pops from strobe units, a flash meter can evaluate the accumulated bursts of light to determine the correct lens aperture.


When you’re using flash mode, you push a button on the meter and then fire your flash within the next 60 seconds. The meter measures the flash, and its LCD tells you what your camera settings should be. It’s that easy. You can take both incident and reflected readings of a flash, but I have always found the incident readings to be flawless and have always used that method.

Flash mode works beautifully on location as well. When I was in Venice, I did a lot of off-camera flash work, such as in the image below, and the balance between the flash and the ambient light was perfect. When I shot famine figures in Dublin, Ireland, the meter was unaffected by the background darkness. It read the flash perfectly in incident mode.

http://www.sekonic.com/whatisyourspecialty/photographer/articles/how-to-use-a-handheld-meter.aspx on 25.11.2015

Lucas Simones - WB 1


Lucas Simões is a Brazilian artist based in São Paulo.
Simões was born in Catanduva in 1980, and moved to São Paulo in 2002, after attending Architecture school. He attended Politecnico di Milano in Italy in 2001. His work has been exhibited in Brazil, Germany, Spain, England,United States, Venezuela and Argentina.
Lucas Simões' work is highly influenced by his architectural and design background. Over the years Simões has experimented working with a wide range of materials: maps, books, photographs, concrete, silicon, wax and paper.
The artist processes the materials in different ways: burning, cutting, layering, reshaping, diluting or distorting them.


Michal Macku - WB 1


GELLAGE

Since the end of 1989, Michal Macku has used his own creative technique which he has named "Gellage" (the ligature of collage and gelatin).
The technique consists of transfer the exposed and fixed photographic emulsion from its original base on paper. This transparent and plastic gelatin substance makes it possible to reshape and reform the original images, changing their relationships and endowing them with new meanings during the transfer. The finished work gives a compact image with a fine surface structure. Created on photographic quality paper, each Gellage is a highly durable print eminently suited for collecting and exhibiting.
The laborious technology, which often includes the use of more than one negative per image, makes it impossible to produce absolutely identical prints: Each Gellage is an original work of art. The artist does make at least 12 signed and numbered prints of each image.
Michal Macku talks about his work: "I use the nude human body (mostly my own) in my pictures. Through the photographic process [of Gellage], this concrete human body is compelled to meet with abstract surroundings and distortions. This connection is most exciting for me and helps me to find new levels of humanness in the resulting work.
I am always seeking new means of expression and, step by step, I am discovering almost unlimited possibilities through my work with loosened gelatin. Photographic pictures mean specific touch with concrete reality for me, one captured level of real time. The technique of Gellage which I am using helps me to take one of these "time sheets" and release a figure, a human body, from it, causing it to depend on time again. Its charm is similar to that of cartoon animation, but it is not a trick. It is very important for me to be aware of the history of a picture and to have a sense of direct contact with its reality. My work places "body pictures" in new situations, new contexts, new realities, causing their "authentic" reality to become relative. I am interested in questions of moral and inner freedom. I do what I feel, and only then do I begin to meditate on what the result is. I am often surprised by the new connections I find in it. Naturally, I start out with a concrete intention, but the result is often very different. And there, I believe, lies a hitch. One creates to communicate what can not be expressed in any other way. Then comes the need to describe, to define."


CARBON PRINTS

Since 2000 Macku uses also other historical photographic techniques in combination with the technique GELLAGE. After experiments with heliogravure, platinum and kallitype he mastered technique of carbon printing. He was provided for working with original negatives of a real master of this technique and one of the legend of Czech photography - worldwide well known photographer Frantisek Drtikol.
The carbon prints are sized approx. 35x30 cm (14x12''), on a top quality graphic watermark paper, stamped and signed and the edition of each motif is limited to 24 numbered copies.
About the CARBON technique
Text from book called: The Book of Carbon and Carbro: Contemporary Procedures for Monochrome Pigment Printmaking. For more information contact author: Sandy King
In versatility and range of possibilities, carbon is a superb process. It is capable of presenting images with a wide range of image characteristics, of virtually any color or tone, and on a wide variety of surfaces. During the entire period of its history when it co-existed with other commercial processes in the second half of 19th century, carbon was considered the aristocrat of printing processes. Carbon prints were more costly than those produced by other processes, about twice as expensive as platinum and three to five times as much as silver. On the other hand, the technique is very difficult to work. But once mastered, carbon process offers a range of possibilities not available with any other photographic system, and difficult to, if not impossible, to duplicate.
The carbon process, like all pigment processes depends upon the fact that colloids (gelatin, gum, albumen, casein etc.), when applied to a suitable support, sensitized with a dichromate salt and activated by exposure to light change their physical characteristics in proportion to the intensity of the chemical or light. The process, called tanning or hardening, makes the colloid insoluble in hot water.
Carbon prints can be made to look virtually indistinguishable from silver prints. Because of their discernible relief, carbon images often have greater apparent sharpness than of silver prints. The archival qualities of carbon prints are superior to those derived from silver salt papers. The stability of carbon is limited only by the gelatin carrier and its paper base, making it the most stable of all photographic processes.
Commercial Carbon Printing: Please contact Michal Macku for more information about commercial carbon printing for museums, collectors, photographers and artists He uses to work with both vintage and contemporary negatives. There is also available retouching and renovation broken glass negatives and vintage prints.